|
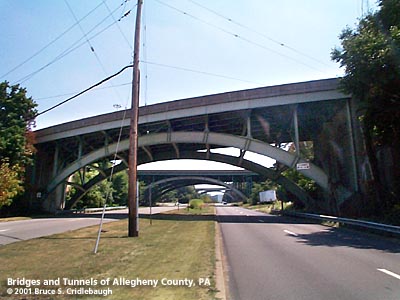
Parkway East over Ardmore Blvd:
View south with Ramp A span beyond;
Twin sets of arch ribs carry Parkway;
Detail of arch, abutment, and truss bent for side span
|


|
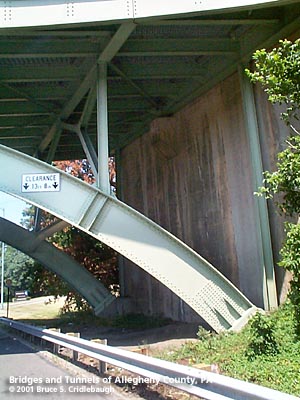
Parkway East over Ardmore Blvd:
Detail of arch abutment and bearing;
Arch ribs, trussed spandrels, floor beams and corrugated deck pans
|


|
Parkway East over Ramp A:
View north;
Western abutment;
View south
|


|
Ramp A over Ardmore Blvd:
View south with Parkway East and Ramp D beyond;
View north from beneath Parkway mainline;
Eastern skew abutment
|


|
Ramp A over Ardmore Blvd:
Eastern skew abutment;
Horizontal curve of floor beams atop arch ribs;
View west - superelevated curve
|


|
Ramp A over Ramp G:
View east from Ardmore Blvd;
View south on Ramp A;
View west from Ramp G, exit from EB Parkway at right
|


|
Ramp D over Ardmore Blvd:
Two views north on Ardmore Blvd;
View north from Morrow Rd, Ramp A in center, Bryn Mawr Rd to right
|


|
Ramp D over Ardmore Blvd:
Eastern abutment;
Western abutment cut into sedimentary rock layers
|


|
Ramp D over Parkway mainline:
View east approaching interchange;
View east
|


|
Ramp D over Parkway mainline:
Details of superstructure, curved deck, and abutment
|


|
Ramp D over Parkway mainline:
View west;
View west at merge of Ramp A westbound;
View east approaching interchange
|


|
Ramp D over Ramp A:
View north;
View south;
Abutment
|


|
Parkway mainline over Ramp G:
Two views south
|


|
Riveted girder;
Skew abutment
|


|
Modifications and new girders added for eastbound climbing lane;
View northeast from Ramp A
|